About Wizlink®
Wizlink® Designer is a workflow-oriented graphical scenario editor with built-in additional tool – data object hunter.
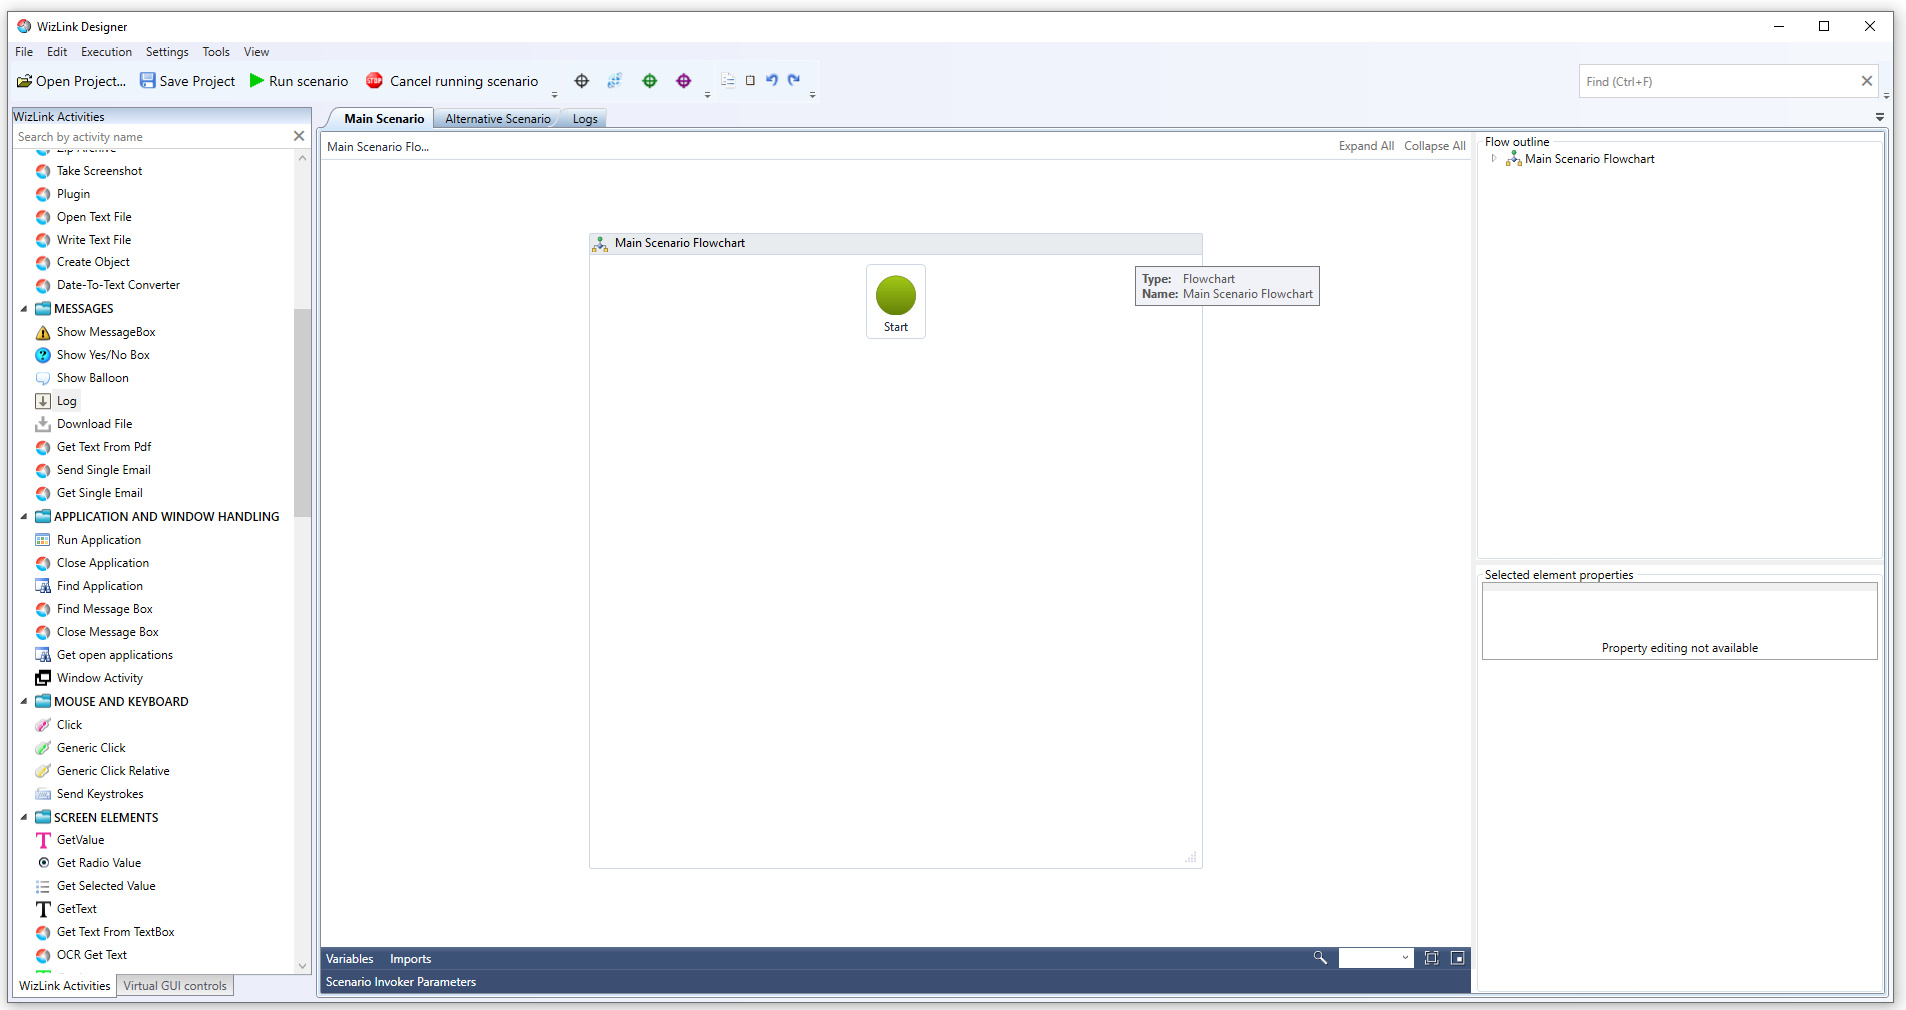
After you have launched your Wizlink® Designer, you will get a below screen.

Main Scenario Flowchart is on the central part of the screen. You create your scenario here. Flowchart is an arrow-node flow diagram that helps to show the following steps performed by robot in a clear graphical way. Alternative Scenario tab exhibits chart analogical to Main Scenario Flowchart. You should create alternative scenario there. There is also a third tab – Logs.
There are two bars at the top of the screen: menu bar and button bar.
There are two toolboxes to the left of the central chart: Wizlink® Activities, Virtual GUI Controls. Choose one of them by clicking on the proper tab in the bottom left part of the screen. You can hide or restore one or both of them by clicking upon the checkboxes in View menu bar.
There are two blue bars at the bottom of the screen’ central part: Variables, Scenario Invoker Parameters. The third bar: Errors, will show below those two once in a while, when error occurs in a projected scenario.
The bottom right corner of the screen is the place where is Selected Element Properties window.
The Flow Outline Window is in the upper right side of the screen. You will find it useful when your scenario will be long and complicated.
Right-clicking upon the flowchart opens context menu that greatly helps during creating a scenario.
There is IntelliSense build-in into Wizlink® - the tool that aids code-completion.
A Search entry box is in the upper right part of the main screen. You can click there and type the string you want to find or choose keyboard shortcut <Ctrl+F> at any time during the scenario creation and Search entry box will automatically get focus. The function searches Main and Alternative Scenario Flowchart for activities in which a given string occurs (case insensitive), no matter in what place or context the string will appear (e.g. an activity name, a variable, an expression, any text, a parameter, an annotation, a control etc.).
After typing a string in the search box, Wizlink® will show in a pop-up window a list of activities in which the specified string was used. Double-clicking upon the selected element from the pop-up window will set the scenario in the place where searched element occurred.
Remember however that you search for activity, in order to use it in a scenario, using the search bar at the top of the Wizlink® Activities toolbox.
this is documentation for Wizlink ver. 1.4; documentation for the next version can be found here (ver.2.x)