Web Application Hunter
Click the blue crosshair icon on the icon bar - it will open the Browser Hunter control window.
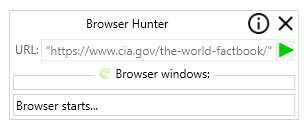
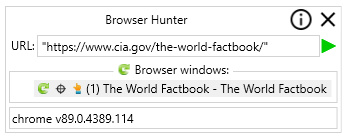
Put the URL address of the page to be hunted in URL field and click big green triangular button to the right (Start Browser). In the lower textbox in the control window the text "Browser starts..." will show. Wait a moment until Wizlink® opens indicated page and text in the lower textbox changes into information about the browser used (name and version).
Hunting takes place on a website specially opened by Wizlink®, at the top of which there is an inscription: "The browser is being controlled by automated test software" (in Firefox no inscription, only icon near URL address).


A line with three icons (green circular arrow, crosshair and a hand) will appear in Browser windows box. Click on that green circular arrow and wait a moment while Wizlink® is preparing the page for hunting. Wizlink® is ready to hunt when the hunter crosshair in the same line becomes visible (becomes black, not grey).
Click on that tiny black crosshair to start Hunter. Wizlink® displays large orange window that says "Loading Hunter" (but Wizlink® is opening Hunter so fast that you will likely only see an orange smudge in the upper right part of the screen).
To start hunting press and hold Ctrl key and at the same time hover the mouse over the website (examining the page). All elements possible for hunting will get a thick orange frame when you hover over it. When you finally choose the screen element to be acquired stop moving the mouse and press the "1" key from the keyboard (remember - keep the Ctrl key pressed). There is no need to click the mouse on the selected screen element, just stop hovering the mouse when the element is surrounded by the orange frame. To hunt next element – examine the page again and press “1” key again. You can hunt any number of elements at once.
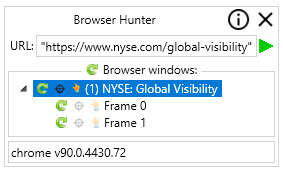
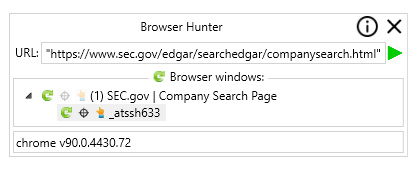
Sometimes due to issues caused by the internal structure of the browser page, Wizlink® is unable to select the desired elements on the screen by surrounding them with a thick orange frame (e.g. a rectangular field surrounds a much larger area of the screen than needed) - go back to the Browser Hunter control window. Click the green circular arrow next to the second line in this window (there is often word frame used in this line label) and repeat the hunt as before. Repeat these steps with the next line(s) if necessary.


Press the hand icon (Get hunted controls) in Browser windows to send all hunted elements (so called controls) to Wizlink® Designer. Hunted controls show up in the Web applications controls section of the Virtual GUI controls tab.
From now on your controls are safe, if you save the scenario and close it - the controls will be in place when you open it again. But first you should name your controls to make them easier to use in the scenario. Controls retrieved straight from Hunter have descriptions in the form of either very long strings of characters, often meaningless or gibberish, or even have no description at all. So right click every control and name it simple and meaningful (like: address, first name, street, email, product1, and so on).
When you close Browser Hunter control window, the website where the hunt took place will be closed at the same time.
NOTE: check Settings page in main menu: in Global Settings you can choose the browser you want to use; in Project Settings you can decide whether to close browser at the end of hunting.
NOTE: every time you open the instance of web browser – it has no cookies at all (so it will not have information that you previously entered into form fields, such as passwords).
NOTE: see also CSS, CSS Selector.